1. Software Introduction
For basic usage of the software, please refer to the Quick StartGuide
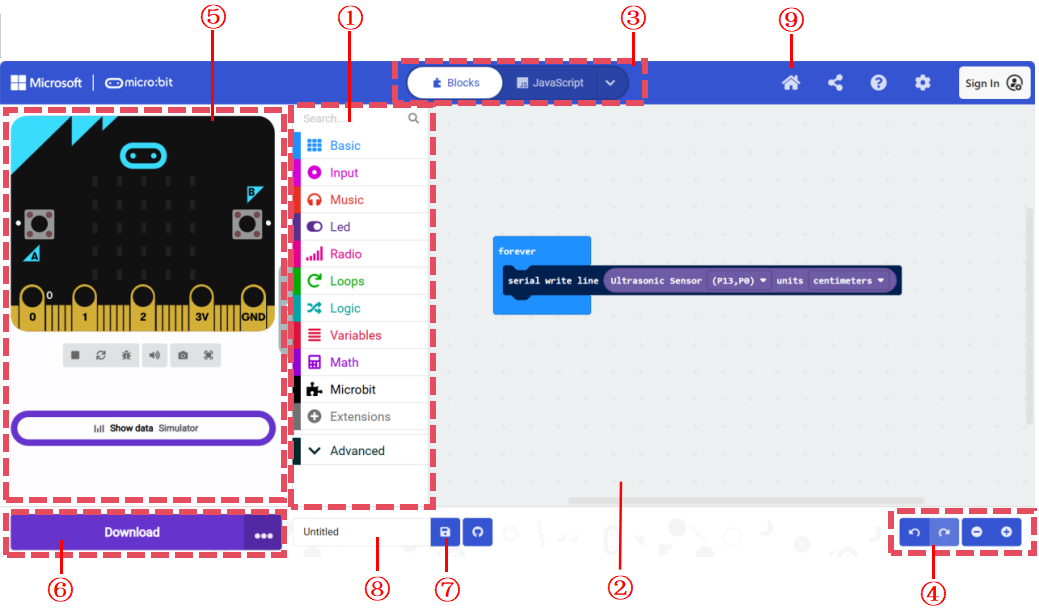
1.1. MakeCode Interface Functions
1.1.1. Coding Interface
No. |
Name |
Description |
|---|---|---|
① |
Code Block Area |
The code blocks required for coding are in this area. |
② |
Coding Area |
Drag and drop the code blocks into this area to program. |
③ |
Code Type Switch Area |
Switch between different types of code display. The default is block code. On the right side, options include Python and JavaScript. |
④ |
Interface Operation Area |
The four options here are: Undo, Redo, Zoom Out, and Zoom In. |
⑤ |
Debugging Area |
Simulate and debug the code in this area, view serial data and hub status. |
⑥ |
Download |
Click the download button to transfer the program to the hub. |
⑦ |
Save |
Click the save button to save the code to your computer. |
⑧ |
Project Name |
Displays the current project name, which can be renamed. |
⑨ |
Home |
Click the home button to return to the home page. |
After clicking the home button in section ⑨, you can access the project management and tutorial-related pages.
1.1.2. Project Management and Tutorial Interface

No. |
Item |
Description |
|---|---|---|
① |
New Project |
Click the new project button to create a new project. |
② |
Historical Projects |
All saved historical projects are displayed here. |
③ |
Import Project |
Click the import button to import external projects. |
④ |
Settings |
Click the settings button to configure the software settings. |
⑤ |
View All |
If there are projects not displayed in area ②, click this button to view all projects. |